WordPress Tutorial
In this WordPress tutorial, you will find everything you need in order to create a website with WordPress. From installation to backups – we have it all covered.
Be sure to check out the list of our newest WordPress tutorials at the very bottom of this page.
WordPress first saw the light of day on May 27, 2003. The founders are Matt Mullenweg and Mike Little.
WordPress can be referred to as an online, open-source site-building tool based on PHP and MySQL programming languages. In more advanced terms it is called a content management system (CMS).
When WordPress was first launched it had several users but over time grew into the biggest and most popular CMS in the world. Today, WordPress is powering over 75 million websites.
Research carried out in 2020 shows that this content management system is used by more than 26% of the 10 million best-ranking sites.
Accessing your dashboard:
Once the installation is complete, the first thing you would want to do is log in to the WordPress administrator dashboard.
Usually, there is a link to the login page on the front end of WordPress website. However, some themes don’t have this link. In this case, the easiest way to log in to WordPress is by adding wp-admin at the end of your website’s address like this:
http://www.yourdomain.com/wp-admin
This URL will direct you to the login screen where you will be asked to enter the administrator’s username and password. Remember, you have entered these details during WordPress installation. If you have forgotten your password, click on the Lost your password? link.
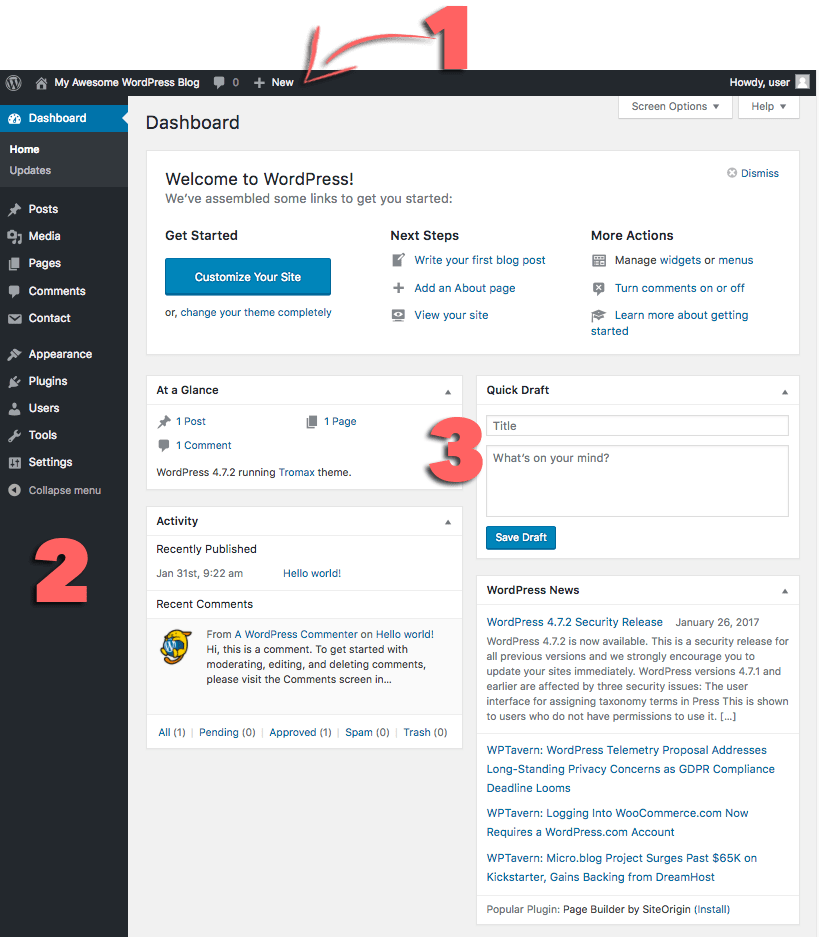
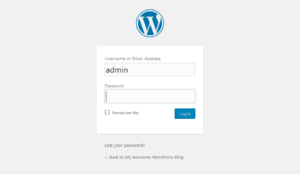 After logging in, you will see the administrator dashboard. It’s built to give you an overview of your entire website and contains 3 main sections:
- A toolbar at the top of the page. It contains links to the most commonly used administrative functions and resources. For example, if you hover over your website’s name, you will get a link to the public view of your site. It also displays simple notifications like updates and new comments count.
- The main navigation menu on the left-hand side. It contains links to all administrative screens of WordPress. If you hover over a menu item, a submenu with additional items will be displayed.
- The main work area.
The first time you log in to the WordPress admin panel, you will see a welcome module which contains some useful links to help you get started.
Once you are comfortable with the dashboard, press the Dismiss button in order to hide this module.
Other Modules:
- At a Glance box will tell you how many posts, pages and comments you have. It also shows WordPress version and theme you are running.
- Activity box gives you a bit more information about your latest posts and comments. It shows the status of all comments and a short list of the most recent comments.
- Quick Draft box. Entering content into this box will start a new blog post. However, you cannot publish one from here as this box is only for taking blog posts ideas for you to come back to later.
- WordPress News. This module displays the latest WordPress news.
Each of these windows has little arrows which you can use to quickly hide the box. You can also drag and drop them to different positions.
Step 3 – Publishing Content
Creating a website with WordPress starts with publishing a new post or a new page. You may wonder – what is the difference between posts and pages?
The answer is simple. WordPress posts can be categorized, tagged, archived. WordPress posts are used to publish time-sensitive content.
In contrast, pages are mainly for static, dateless content. They don’t have categories or tags. Contact us or About pages are good examples of pages.
Step 3.1 – Creating a New Post
To create a new WordPress post open the Add New section under Posts or choose New -> Post option from the top toolbar.
You will be presented with an editing screen with an array of posting features. The first thing you should do is enter a title for your post.
Secondly, enter the actual content of your post in the field below. If you want to format your text, use the toolbar options.
It’s similar to the one you can find in MS Word or any other popular text editor.
At the right-hand side of the screen, you can see the so-called meta-boxes. Each box has a particular function.
- Publish. Here you can change the status and visibility of your post, schedule it. By clicking the Publish button your post will go live. If you decide to delete the post, press the Move to Trash button.
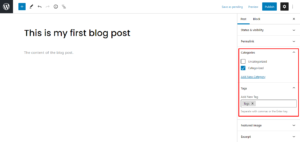
- Categories. On this box, you can assign your post to a specific category. You can even create a new one by pressing the + Add New Category button.
- Tags box allows to quickly add new tags.
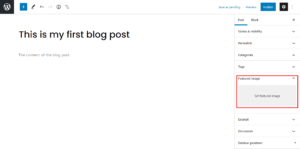
- Featured Image. Here you can assign a featured image to a post. It will be visible at the very top of the post (image location can be different depending on theme).
How to Add a New Post in WordPress – Step by step
There are multiple ways to add a new WordPress post, and all of them will lead you to the visual editor.
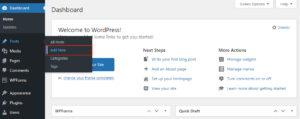
The first option is from Dashboard -> Posts -> Add New.
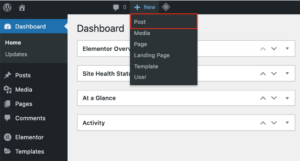
The second option is to click on the “+” icon in the header and click Post.
Keep in mind that posts and pages are two different aspects of a WordPress website.
Posts are pieces of content on a blog page that are listed in reverse chronological order. They usually come in the form of articles and get published regularly.
Pages are meant for static and timeless content, like on a home page or a contact page. Pages get updated once in a while but mainly tend to stay the same.
Adding Title and Content
Both the post’s title and content are essential parts of the website’s SEO.
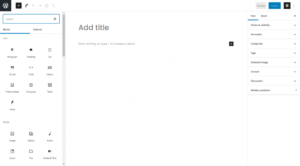
You’ll automatically see an Add Title field on the top of the page of the visual editor. It is possible to publish posts without titles, making it harder for readers to find the post.
Right below the title field is space to add any type of content using blocks. If you’re starting with a text, just begin writing.
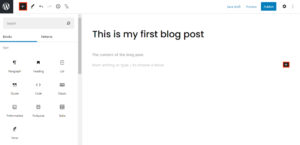
To add other blocks, click on the “+” icon on the top left of the screen next to the WordPress logo or on the editor’s right side.
There are blocks for all common content types, including a Paragraph, Column, and Heading. Along with blocks, you can add widgets, such as Latest Comments and Search. There are also blocks designed to embed third-party content.
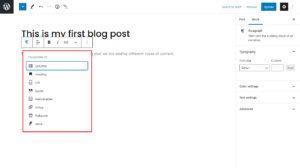
You can also transform some of the blocks. Start with a Paragraph block, then change it into a column, or heading, or quote by clicking on the block icon button.
To make further edits, click on the Settings icon on the top right corner of the screen, then select the Block section. This will provide more editing options to all blocks.
If you find using blocks is too complicated, the Classic block is available. This block adds content as you would using the Classic Editor, which converts back to a block once finished.
Adding Images
Without images, most websites would find it hard to capture visitor’s attention. Having well-optimized images not only helps to make your posts and pages more appealing but also increases the site’s speed and improves its SEO rankings.
There are two main blocks for images – the Image block for a single upload and the Gallery block for multiple images.
If you want to show a single picture, choose the Image block. Gallery block is the better option to display several pictures in rows and columns with a grid layout.
There are three ways to upload an image or multiple images when using the WordPress Block Editor:
- Drag and drop the media directly into the chosen block.
- Add existing media from the Media Library.
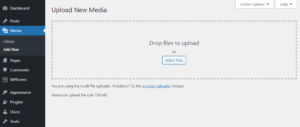
- Or insert a new image by going to the Dashboard -> Media -> Add New.
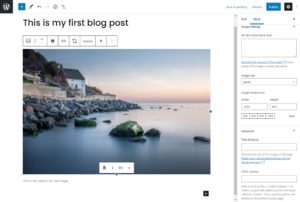
To edit the image, click on it and head over to Settings -> Block.
There, change the style, size, and dimensions to your liking. You can use the default image sizes or customize them to suit your website.
Adding Other Media Files
Adding other types of media files also helps with making a post more visually appealing to website visitors. Ranging from videos and audio to downloadable documents, multiple types of media files can be added to a post.
First, head over to Dashboard -> Media -> Add New.
There is also an add Media button under the “+” symbol on the header. Adding media can also be through blocks. Click on the “+” sign again, and head to the Media section.
Another way to add images, audio, and videos is by copy-pasting the URL in the block. This option is helpful if you want to make posts and pages load faster.
Adding a Featured Image
A featured image is a picture that will appear on search engines or when sharing the post on social media platforms. It attracts visitors, increases content value, and improves SEO rankings.
To add a featured image, head to Settings -> Post -> Featured image -> Set featured image. You’ll be directed to the Media Library, where you’ll be able to pick an image.
The image you’ve selected can be edited using the tools on the right side of the Media Library. Along with the options to change the alt text, caption, and description of the image. If you feel like changing the featured image, click on the Replace Image button under the Settings section.
Keep in mind that some WordPress themes don’t support featured images, so you’ll have to take additional steps to ensure your posts have featured images.
Choose your featured image wisely, as it is the first thing your WordPress site visitors will see before opening the post.
Adding Categories and Tags
Implementing categories and tags to your posts is essential for SEO and simply keeping the WordPress website organized.
Categories cover the general topics of the blog, and tags are more specific to the post. For example, when writing a particular recipe as a blog post, the tag would be “pasta recipes”, and the category will be “recipes”.
Keep in mind that it is possible to add more than one category and tag.
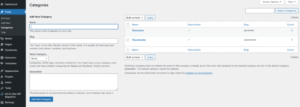
To add a new category or tag, go to Dashboard -> Posts -> Categories or Tags. From there, edit the name, URL slug, and description, and view all the posts under the categories and tags.
Add Excerpt
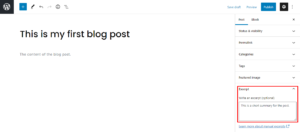
An excerpt is the summary or teaser of the blog post or article. It’s used to attract the readers’ attention and convince them to read further, as sometimes the title and featured image are not enough.
WordPress will automatically use the first 55 words of the blog post or article to generate the excerpt. However, if you want to customize it, you can create one of your own.
Head to Settings -> Post -> Excerpt, and write in the box.
Publishing the Post and Publishing Options
Now that you’ve finished creating the new post, let’s move forward to the publishing process.
Draft
WordPress automatically saves changes made, but we suggest also doing it manually once in a while by clicking the Save draft button on the top right corner.
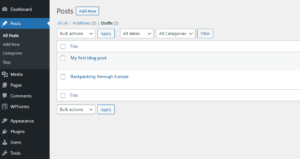
The Save draft option lets you leave the editor without publishing and come back to it another time. To find the draft again, go to the Dashboard -> Posts -> All Posts -> Drafts.
Once you’ve published the post, there is an option to change the post back to draft. Simply click on the Switch back to draft link on the top right corner of the screen.
Preview
The Preview button shows users what the post will look like on the website. This feature helps you make any adjustments before publishing. Sometimes, different WordPress themes can change the display of the content entirely.
The preview option can also adjust the visual editor to different screens. By default, the editor follows the desktop screen, but this tool also shows how the editor looks on a tablet or mobile device.
Status and Visibility
There are three options for post visibility:
- Public – makes the post visible to anyone.
- Private – the post is visible only to the authorized users who are logged in to the Dashboard.
- Password Protected – allows to create a unique password and give access only to those who know it.
Once the new post is published, it is still possible to change the visibility option. Simply head to the Settings, and click on the link next to Visibility.
Scheduling
The scheduling feature helps to regulate the output and timing of WordPress posts.
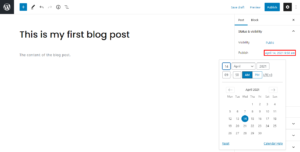
To schedule posts using WordPress, click on the Settings icon and then the link next to Publish.
It will display a calendar and an option to change the exact minute, hour, day, month, and year. Make sure to check the time zone as well before publishing.
Note that scheduling posts can be for a future date or a past date. This is useful to know if you want the post to appear as it was published on a different date than initially.
Publish
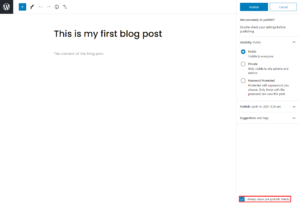
Now that you know all of the options and processes, it’s time to publish the draft article. When you click the Publish button, it will show the visibility of the post, the publishing date and time, and suggestions from WordPress.
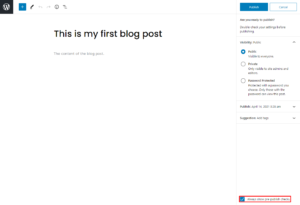
If you don’t want to do pre-publish checks for your posts, simply uncheck the box on the bottom right side of the screen.
Delete a Post
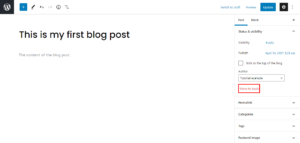
There are different ways to delete a post. The first option is to go to Settings ->Move to trash.
WooCommerce Tutorial: How to create and manage products
Adding New Products
The process of adding new products is similar to uploading a new post to your WordPress blog. Follow the steps below to add a WooCommerce product to your eCommerce store.
- Get started by clicking on Products, which is located under WooCommerce. From there, click on Add New.
- Then, type in your product’s name and add a detailed description including relevant information about your product.

- Scroll down to the Product data section and choose the product type. Then, set additional information – price, stock and inventory, shipping, linked products, etc. Check the Virtual box if your products are non-physical goods and don’t need shipping, and check Downloadable for products such as software or files.

- Next, give your product a price and include a short description to be displayed below the product’s name.
- On the right side, add the Product categories. Add a new category or file it under a previously made Parent category.
- Product tags give you the option to label your products, making it easier for customers to find them.
- The Product image area allows you to upload or assign an image to your product.
- Product Gallery is where you can add more images to your product.
- Once you’re happy with the settings, check the Preview, Save Draft, or click Publish. Here you can also choose the visibility of your product. The default is public, while other options are password protected and private. Note the Catalog visibility option which has the following settings:
- Shop and search results. Your products will be visible everywhere: search results, category, and shop pages.
- Shop only or Search results only. The products will show up either only on shop and category pages or only on search results.
- Hidden. Products will be visible only on the single product page, and not on any other pages.
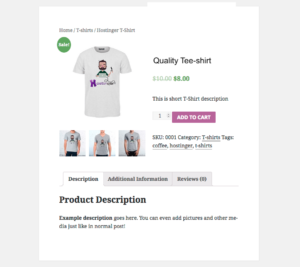
- Here’s an example with a featured image:
Adding Products
It is essential to learn the basics of WooCommerce and understand what product categories, attributes, and types are:
- Product category. This helps group your products. For example, if you sell apparel, top wear, bottom wear, and nightwear could be your product categories. They enable the shopper to locate products from the same category quickly. You can create as many categories as you want and edit them anytime.
- Attributes. This filters the products by size, color, fabric, and by what the customers like, to help them choose their desired products easily. You can either assign attributes independently to each product or set up a global attribute for the entire website.
- Product Types. WooCommerce saves the customer’s time by having predefined product types:
- Simple – a stand-alone product that is shipped without any other additional options. For example, one physical book.
- Grouped – you can group related items such as a dozen shot glasses.
- Virtual – these are products that require no shipping as they are not physical entities, like services.
- Downloadable – digital products that you can download. For example, songs, images, videos, eBooks, etc.
- External – products that are advertised on your website, but are sold elsewhere.
- Variable – these products have variable qualities like sizes, colors, etc. For example, shoes and clothes.
Managing Products
Let’s continue with this WooCommerce tutorial by checking the Products page. You can see and manage all of your products as well as edit, preview, feature an item, and apply bulk actions by selecting multiple products.
Here’s what else you can do with your products:
- Duplicating a product. Find the Duplicate button under each item. WooCommerce will create and open a new product draft for you to edit. It’s super useful if you have similar items to sell.
- Marking a product as featured. Click on the Star icon of the products of your choice. Featured items can be displayed on your homepage or be included in posts by using shortcodes.

- Deleting a product. Click on the Trash button that appears under the product name when you hover over it.
4. Managing WooCommerce
Now that you understand how to manage products on WooCommerce, in this part of the tutorial, you will learn how to handle everything else – orders, coupons, reports, and other online store settings.
Managing Orders
A new order is created every time your customer completes the checkout process. View them by clicking on WooCommerce -> Orders on the left-hand menu.
Each order has its unique Order ID, date of purchase, order status, and total price.
To edit or view a single order, click on the Order name. You can easily update the order status, modify the ordered items, issue refunds, as well as view and change pricing, taxes, shipping, billing, email address, and more.
Managing Coupons
Coupons are a great way to market and sell your products. With WooCommerce, you can add, edit, and view coupons in the Coupons section.
Creating a new coupon is similar to creating a new post or product. First, choose a name or generate a coupon code. Then decide on the discount type which can be fixed or a percentage. You can choose free shipping as well. Then select the expiry date and click Publish.
If you need to edit a coupon, simply click on its name, and make the necessary changes.
Customers
In the Customers section, view all your previous customer’s information. This includes:
- Name
- Username
- Last Active
- Sign-up date
- Email address
- How many orders
- Total money spent
- Country/Region
You can also download this information into a PDF file.
Managing Reports
In the Reports section, you can see your store’s performance from the number of items purchased, gross sales, average daily sales, and product data, to other relevant stats.
You can get started generating statistics for separate products, categories, or coupons in this section. Do this by selecting the period for which you would like to create the report – the previous month, the current month, the previous seven days, or any custom duration, and click Go to generate the report.
Additional notes: Settings
On the Settings page, you can change your online store’s core options, such as location, currency, or API settings. But be sure to hover on the question mark beside each of the settings for a short description before making any significant changes. Now let’s go through the available tabs and briefly overview what can be changed there.
- General. On this tab, you can change the store’s main settings such as location, currency, payment gateways, as well as enable/disable taxes, display notices for all your visitors, offer free shipping, and so on.
- Products. There are various product settings from different sections that you can customize:
- General – set the measurement units, enable/disable reviews, and set the base page of your shop.
- Inventory – customize the default stock options, enable/disable stock management, enable email notifications, etc.
- Downloadable Products – configure file download methods and access restrictions if you sell downloadables.
- Tax. Here, you can choose to include or exclude taxes when you enter the price, enable the automatic tax management, include or exclude tax in the pricing display, etc. You can also set new locations to follow a certain set of rates – standard rates, reduced rates, and zero rates.
- Shipping. You can add settings for shipping zones, shipping methods, free shipping, rates, and other shipping options. You can even set a different shipping rate for separate locations.
- Payments. On this tab, feel free to enable, disable, and manage all the available payment gateways.
- Accounts & Privacy. Select this tab to change the account settings for your customers, such as allowing guests to checkout without an account, letting them create an account during checkout, etc. You can also set a policy message to appear during account registration and set how long you want to keep customers’ data.
- Emails. It allows you to configure the settings for emails you send to buyers. You can also customize email templates and change email details.
- Integration. Here, you’ll get to integrate your store with Facebook and benefit from its features such as Messenger integration, showing your Facebook ads to potential buyers, install tracking pixel, etc.
- Advanced. This tab allows you to edit the settings on set pages, force SSL on checkout pages, enable or disable WooCommerce API, authorize access to external apps, and set their permissions. Webhooks can be configured in this section as well.


